Music festivals have come a long way since Woodstock defined a generation more than 50 years ago. Weekend-long events like Coachella, Glastonbury, Primavera and Bonnaroo are cultural events that regularly draw hundreds of thousands of fans to see many of their favorite music artists in one place. Landing a performance slot at one of these festivals is on the bucket lists of up-and-coming artists and living legends alike.
Operating the lighting for an artist during a festival can be exciting, but also comes with a unique set of challenges. The jam-packed schedule and short changeovers necessitate a flexible approach that may or may not incorporate the lighting package your artist usually travels with. In this article, we’ll cover how to set up a show file for a festival rig, choose fixtures, organize and use presets effectively, program during changeovers and much more.
Set and Setting
The premise of this guide is that you’re programming a tour that’s traveling with a ground lighting package only. Ground lighting packages are self-contained lighting rigs that stand freely on stage, and are great for artists performing in clubs, opening arena shows and breaking into the festival circuit. When preparing for festival appearances, it’s a good idea to program supplemental lighting for the provided truss rigs. The goal here is to prepare your show file to accommodate a wide range of configurations and situations.

Rebelution at Red Rocks, 2019. Photo: Sam “Deen” Medina.
Talk to the Artist
Before you make any decisions, it is absolutely essential to have a discussion with your artist and their creative team about their festival lighting needs. The artist should always be involved in the creative process. Even if they’re relaxed and hand you the creative reigns, you need to keep a line of communication open regarding your preparation for their show. Also be sure to communicate any challenges you might anticipate to keep their expectations in the realm of reality.
Prioritize Songs and Moments
You can never be sure how much time you’ll have to program before each performance. Your programming time can be cut short at any moment, which is why it’s crucial to program the most important parts of the show first. It’s a good idea to begin by programming the top of the show and follow up with the encore. Then hit any important songs in the middle of the set, and continue to move down your priority list.
To Ground or Not to Ground
The next question to consider is whether or not to use your ground package during festival appearances. Ground packages are usually custom-designed and can contribute a memorable visual quality to your artist’s performance. However, with short changeovers and limited load-in logistics, using your package is not always feasible.
Let’s examine the three potential situations:
- You’re able to use your ground package at every festival. In this scenario, your ground package programming can perform most of the heavy lifting, allowing your festival rig programming to be more experimental or supplemental.
- You’re unable to use your ground package at any festival. In this scenario, you will have to completely rely on programming every element of your show on the festival rig.
- You can use your ground package at some festivals, but not at others. In this scenario, you’ll need to adopt a hybrid approach that allows you to take advantage of the benefits your ground package offers—but it doesn’t leave you high and dry if you have to go without.
Program As If You Have No Ground Package
Even if you and your team anticipate having access to your ground package at every festival, it’s a good idea to plan for the worst. Complications can happen at any time, whether it’s bad weather, a late truck arrival or a last-minute change by festival management. If you prepare a version of your show file that focuses on festival rigs and ignores your ground package, you can save you, your team, and most importantly, your artist a lot of stress and embarrassment.
Song-Per-Page Method
Preparing your show file with a song-per-page macro makes it easier to navigate effects and presets that are specific to each song. This is in contrast to setting up a single macro to operate the entire show from. Let’s say you want to edit one of the effects for a certain song. If you’re using the punted method, you’ll have to search through all the effects used in the entire show to find the one you want to edit.
The song-per-page method enables you to organize everything you need for each song on its own page, saving you a significant amount of time when updating your programming for each festival stop. You can also separate touring package effects and presets from festival rig effects and presets to further expedite “day-of” programming.

“I use song macros that fire a different sequence, page and view per song. This makes it easy to navigate notes, effects and presets that are song specific.“
Traffic Light Method
When you’re up against limited time to prepare your file each day, it’s important to use a system that keeps track of what you’ve already done and what still needs to be updated. A color-coding system gives a clear visual indication of your process and will help you maintain consistency from show to show.
Start out with all your songs coded red to indicate the song page hasn’t been updated yet. Changing the color to yellow means you’ve done some level of programming but may want to revisit, while the color green means the song page is completely updated and does not require any additional attention.
Choosing Fixture Types
One of the most important choices you’ll make is deciding which types of fixtures to base your master show file on. It’s better to use full-featured fixtures because it’s easier to subtract aspects of your programming to suit a simpler fixture than it is to add complexity to suit more advanced fixtures. In this regard, Martin fixtures are excellent choices due to their industry-standard color mixing and zoom range.

Martin Mac Viper Profile
Here is a list of suggested fixtures for each type.
- Spot/Beam: Martin MAC Viper Profile
- Wash: Martin MAC Aura
- Strobe: Martin Atomic 3000 DMX
Festival Rig Configuration
It’s extremely unlikely that you’ll come across two festival rigs that share the exact same configuration. Get used to constantly adapting your show file to work with a different plot each day. Therefore, it’s essential that you have a generic design that serves as a common starting point and can be sized up or down to match each festival rig. The following is a great configuration to start from:
- Two rows of 12 spots each
- Two rows of 12 beams each
- Two rows of 12 washes each
- Two rows of 12 strobes each
- One row of 12 spots for front light
- One row of 12 blinders

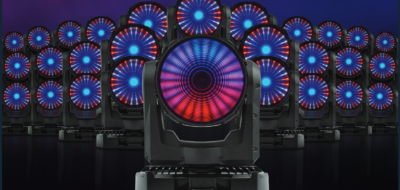
Festival Rig Example. “You will come across a different rig with every festival you travel through, so be prepared for constantly adapting.”
Less is More
No matter how much work you put into your festival programming, it’s rare that the results will end up exactly how you planned. Following a less-is-more approach can greatly reduce potential stress. Broader strokes will ensure that your adaptation to the festival rig will be efficient. Fewer intricacies in your programming will require less time to recreate complicated looks, resulting in more time to dial in the most important elements.
However, if you’re keen on programming some sophisticated looks—per your own ideas or the artist’s requests—feel free to include them in your show file. Just make sure you can easily update this look based on the fixtures you have available. Be prepared to check all of your presets during a 30-minute changeover. Even if you’ve been promised extra pre-programming time, these slots can be taken away last-minute.
Follow these preset tips to maximize your programming time:
- Limit your number of position presets to fewer than ten. These are the most time-consuming presets to update. The less time you have to spend updating, the more time you have to check your presets.
- Only use a handful of color mixing presets for spots, washes and strobes. Restrict usage of color wheel presets exclusively to beams.
- For zoom presets, begin with just one narrow option, one mid option and one wide option.
- Stick to a few generic gobo looks, such as dots, cones, breakup, linear, etc.
- Practice and experiment applying reduction techniques with other attributes.

“Creating a page where you can easily clone your showfile festival rig to the actual festival rig can keep your head a bit clearer than just using the cloning GUI.“
Cloning is Your Friend
While it may sound scary if you’re not accustomed to it, cloning is the best way to transfer information over to the festival rig. Spend a day practicing cloning your fixtures to other fixture types. Separate your fixtures into source groups (ground package fixtures) and destination groups (festival fixtures). Store any special looks as their own “all” preset in your show file. This way, you can easily replace them with another “all” preset if necessary, instead of updating multiple parameter presets.
Update your festival rig file after cloning, but do not update your source file. This will cause lots of headaches and wasted time on your next tour stop.
Two Show Files are Better Than One
Sometimes the lighting plot you encounter will exactly match the festival plot that you were given beforehand, but more often than not, a few changes will have occurred. It’s a good idea to have two files prepared:
- One show file with all fixtures patched, positioned and cloned—this will have you ready to go immediately, in the event that the plot hasn’t changed
- A second show file with all fixtures patched, but not yet positioned and cloned—this will help you adapt to the actual rig in front of you without having to remove incompatible information
Follow these methods to help make performers look great night-after-night regardless of the setting, and make yourself look like a rock star to the rest of your team.
I hope this article has been helpful to you but also invite you to view my full recorded ‘How to Program a Show for a Festival Rig’ Martin Learning Session webinar:

We invite you to view all our upcoming Martin Learning Sessions and our recorded Martin Learning Sessions Playlist. Our complete audio, video and lighting Learning Sessions Calendar and our library of all recorded learning sessions is available as well.