When it comes to expert drum mic placement tips, few audio engineers bring the depth of experience that professional audio engineer Oliver Roman does.
Oliver has spent years tracking drums, vocals, and other instruments in top studios—and his go‑to techniques translate perfectly to home rigs.
In this guide, you’ll learn Oliver’s key strategies for capturing overheads, snare, kick, and stereo imaging. We’ve distilled it all down from two in‑depth sessions Oliver hosted into one actionable workflow. Let’s break it down:
Overheads: Expert Drum Mic Placement Tips for Stereo Imaging
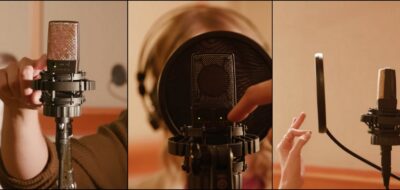
Overhead microphones capture both the kit’s cymbals and your room’s ambience. Oliver relies on the AKG C414 XLS and C414 XLII microphones for their nine pickup patterns that enable you to choose the perfect setting for every application. Both mics have three switchable bass-cut filters as well as three pre-attenuation levels. Here are Oliver’s two proven recommendations:
1. Glyn Johns Drum Mic Technique
-
-
- Well-Regarded: Legendary Recording Engineer and Producer Glyn Johns perfected this well-regarded drum mic placement technique for flawless capture.
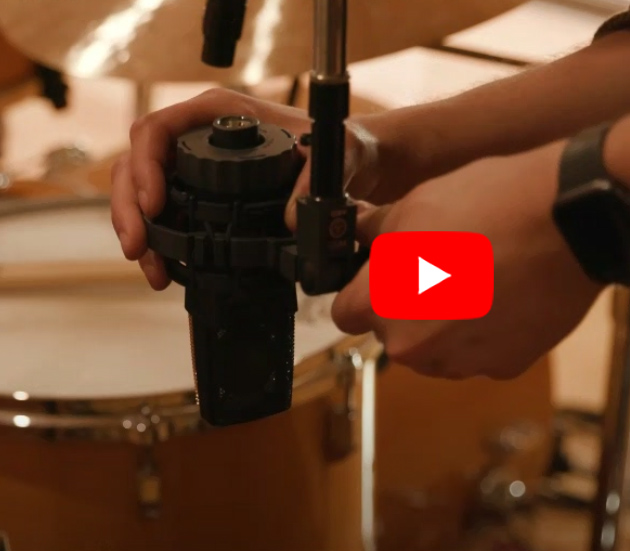
- Paired Up: Two AKG C414s set to the Cardioid pattern.
-
Legendary Recording Engineer and Producer Glyn Johns perfected this well-regarded drum mic placement technique for flawless capture. Watch it.
Setting Up:
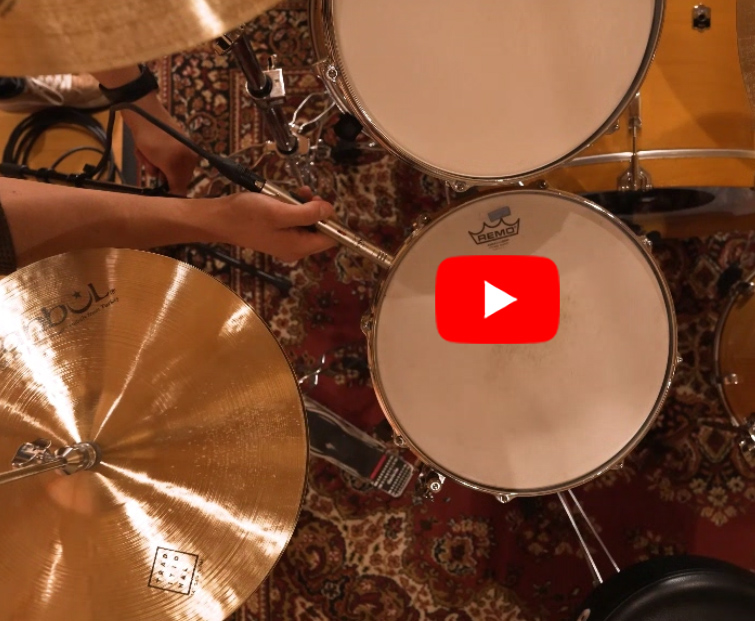
- Take one C414 directly above the snare drum to capture the side of the drum kit with the tom as well as the hi-hat.
- Then position your second C414 facing directly toward the snare and the hi-hat. It’s also going to pick up the floor tom and a bit of the cymbal crash.
- The Phase Relationship
-
-
-
-
- Measure the distance to each of the microphones from the center of the snare drum to ensure phase relationship.
- To do this, hold the cable in the center of the drum and position the other in the same spot.
-
-
-
-
- See For Yourself: Check out the Glyn Johns Drum Mic Technique for yourself.
-
2. Spaced Pair Technique
-
-
- Why It Works: With one mic over each side of the kit, you’ll capture a wide stereo image that presents two perspectives of the drums.
-
-
-
-
Using the Spaced Mic method, with one mic over each side of the kit, you’ll capture a wide stereo image that presents two perspectives of the drums. Watch it.
The Right Mics: Two AKG C414s set to the Cardioid pattern.
- Ideal Placement:
- Position one mic above the left side of the kit and the other above the right.
- Measure each mic’s distance to the center of the snare drum to ensure they’re equidistant
- A slight inward or outward shift can make a big difference in stereo balance.
-
-
-
-
- Watch It: Watch Oliver demonstrate the Spaced Pair Technique.
-
Technique Comparisons:
-
-
- Glyn Johns: Narrow, centered image; emphasizes snare and tom detail; great for punchy rock and tight pop kits.
- Spaced Pair: Wide, spacious image; emphasizes cymbals and room depth; ideal for ambient jazz and live‑feel tracking.
-
Snare: Expert Drum Mic Placement Tips for Punch Without Bleed
- What Makes a Great Snare Mic?

- Tips for Getting a Great Sound:
- Aim the mic at the center of the snare drum.
- Angle it slightly toward the edge to pick up some shell resonance and attack.
- Place the hi-hat in the mic’s null (at the rear) to minimize bleed from the cymbals.
- Check It Out: See Oliver mic the snare drum.
Kick: Finding the Sweet Spot
- What Works Best:
-
“The closer you get to the beater, the more attack you get from the drum.” Watch it.
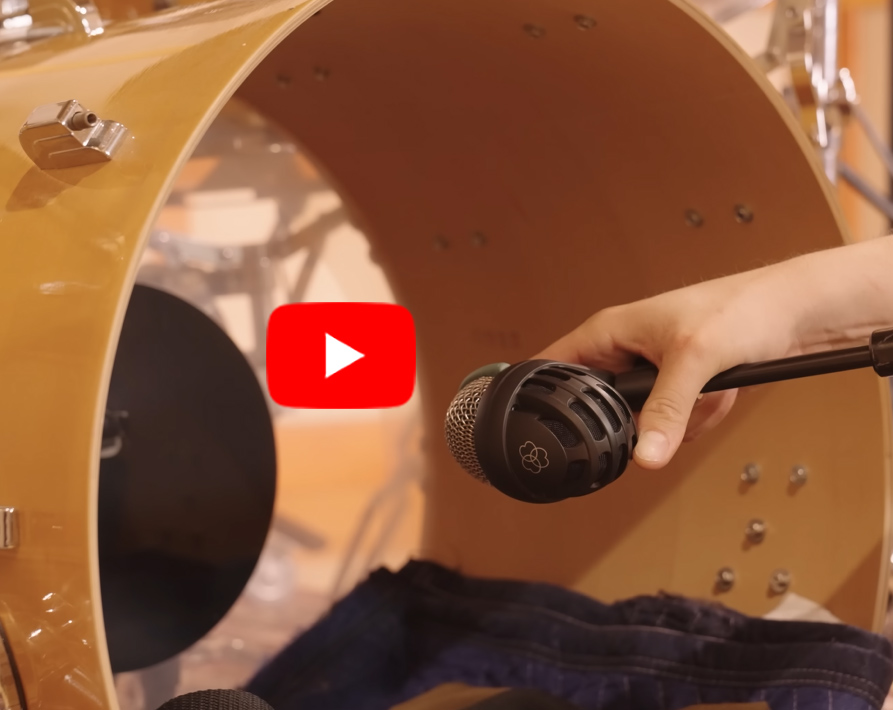
For miking the kick drum, the AKG D112 is a true workhorse.
- It has high SPL capability with no additional EQ required.
- It can handle more than 160 dB SPL without distortion.
- It also has a large diaphragm that has very low resonance frequency, so it delivers a really powerful punch below 100 Hz.
- It also includes an integrated hum-compensation coil that keeps noise to a minimum.
-
- Getting Perfect Placement:
- The closer you get to the beater, the more attack you get from the drum.
- So if you want something really attacking, you can go in tight.
- If you want a full picture of the kick drum instead of just the attack of it, point the D112 at the beater and you’ll still get the attack but also have the low end develop in the kick drum.
- Go to the Video: Oliver discusses best strategies for miking the kick drum.
Room & Auxiliary Mics: Adding Depth and Definition
While overheads and close mics give you the kit’s core, a well‑placed room mic can inject life, space, and three‑dimensional realism.
Try a large‑diaphragm condenser (like the AKG C414 in Omni position) or a pair of small‑diaphragm condensers about 6–10 feet back, aimed directly at the center of the kit. Aim for 60–90° apart, with each mic at ear‑height or slightly above, to capture natural stereo ambience.
- Phase Tip: Once placed, do the cable‑at‑snare trick again for each room mic, then listen in mono: if the room track thins out, nudge it a few inches forward or back until it fattens up alongside the overheads.
- Snare Bottom Mic: Flip a C451B under the snare, about 1–2 inches from the resonant head, aimed at the snares. Invert its polarity and blend it in to taste for extra snap and “ghost‑note” detail.
- Optional Subkick: For earth‑shaking low end, hang a subkick (or a small speaker‑based mic) just inside the kick’s front head. Blend subtly under your D112 track to reinforce sub‑30 Hz punch without mud.
Adding these room and auxiliary mics will give you a fuller, more immersive drum sound—perfect for recordings that need real‑world size and extra low‑end heft.
Experiment and Refine
Every room and kit is unique—these techniques are starting points. Tweak heights by a few inches, rotate patterns on your AKG C414 from cardioid to wide cardioid or omni, and don’t be afraid to swap the order of your EQ and compression.
By applying these expert drum mic placement tips, you’ll consistently achieve mixes that sound polished, powerful, and professional. Now grab your mics and start tracking.
Explore Further
Dive into our support resources to get complete details, specifications, and more:
Ready to Talk to a Solutions Expert?
We’d love to discuss your projects and ideas. To locate a representative near you, please visit our WORLDWIDE LOCATOR.